Here is a really simple way of adding a extra layer of protection to a web interface that allows you to remove or delete files, articles etc. It is very easy to use and can save you from some real headaches. It is a very basic JavaScript function.
<a href=”delete.php?id=fileid” title=”‘filetitle'” onclick=”return confirm(\’Confirm delete of ‘filename’?\’)”>Delete</a>
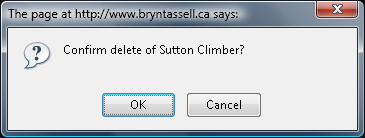
This will create a prompt that comes up with “OK” or “Cancel”. This can easily be added to your site to give you an extra layer of protection against accidentally deleting your important files.
The lazy programmer’s alternative to an undo feature!
This way it’s much easier to blame it on “user error” 😉